Boru Calendar Replacement Introduction
The VTiger Calendar Replacement lets you work in VTiger while using a “GMail-like” Calendar. This will allow you to take advantage of the many benefits of VTiger while not getting frustrated because the calendar doesn’t work as well as you want.
Prepare for Installation
Backup your vTiger
The installation process will modify your vTiger database. If you have previously modified your code, installing Advanced Search may break your code. Boru provides support for modified code for an additional fee. Please contact Boru for more information.
In any case, it is wise to backup your code and database before proceeding.
1. Backup your database. A mysql backup guide
2. Backup your vTiger code. In Linux:
| $ tar czvf vtigerBackup.tar.gz /path/to/vtiger |
IonCube Encoding
Boru Modules require IonCube to run. If you are on a shared hosting – please contact your hosting provider to enable IonCube, otherwise follow the instructions below.
1. Download file below: http://prodl05.borugroup.com/ioncube/loader-wizard.txt
2. Rename the file to loader-wizard.php
3. Put it into your web directory so it can be opened using the browser, for example ‘http://www.mydomain.com/loader-wizard.php‘.
4. Open the file using your browser and follow the instructions.
- Note, if you have Zend products installed such as Optimize or Guard Loader – you will have to put the IonCube variable first, for example:
| zend_extension = /usr/lib/php5/20060613/ioncube_loader_lin_5.2.so |
The proper zend_extension line to add into your php.ini file will be inside the ini file provided by the wizard. Copy and paste that into your php.ini ABOVE the existing zend_extension line.
- If you do this method, you will need to make sure to update the apache2 php.ini and CLI php.ini if they differ.
Pre-Requisites
First step before going forward is to make sure that your system is compatible with Boru Module. Please click here to download the file, extract it, place it in your vTigerCRM directory and open it in your browser. Depending on your setup you will see if you have all the necessary PHP extensions enabled. If some are not enabled, please make sure you enable them before you install the Boru Module.
| – PHP Version: 5.2.6-1+lenny16 – OK – SOAP: Enabled – OK – MBSTRING: Enabled – OK – IONCube: Enabled – OK (version 5.2) |
Installing Boru Calendar Replacement Module
Instructions below are for vTiger 7.
- Open vTiger
- Mouse over the “Settings” icon
- Hit “CRM Settings”
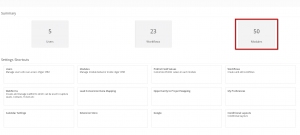
- Click on “Module Manager”

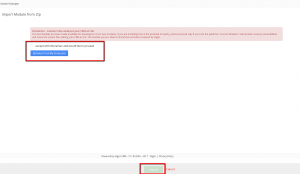
- Hit “Import Module from Zip”

- Click “Select from My Computer” and browse to the location of the module
- Accept the License agreement
- Hit “Import”

Activating Boru Calendar Replacement Module
- Open Vtiger
- Mouse over the “Settings” icon
- Hit “CRM Settings”
- Click on “Module Manager”
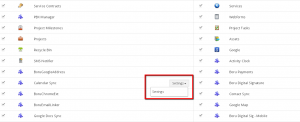
- Click on the Hammer next to the installed module name

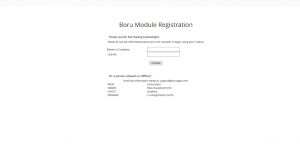
- Once the Boru Module Registration window opens, enter the “Name or Company” and the License key you were given by Boru.
- Hit “Activate” and the module will be activated.

- Note, if you are on a private network or work Offline, please send us the “PROD, SHNAME, HHOST, DIRNAME” and we will send you the offline activation file.
- You will be redirected to the Calendar Replacement settings area, enter the “Web2Cal” license, and save.
