
Built-In Workflows
Workflows provide a powerful way to reach your customers, support your customers, and set internal reminders with automated protocols. You can set any conditions (If X, then Y) to achieve varying work tasks.

Examples of How Workflows are Used:
- Trigger email / text follow-ups to an original email / text
- Send an email/text follow-up based on your clients response (X = If they click on a link in email, Y = send a follow-up about link)
- Change fields on records depending on status (If a lead status field is X, send Y email)
- Assign a certain sales rep based on the region the client is in (If the zip code field = X, it will be assigned to Y sales rep)
- Much more! You can set conditions to fit your business needs.
Set Up a Workflow:
Step 1: Go to CRM Settings
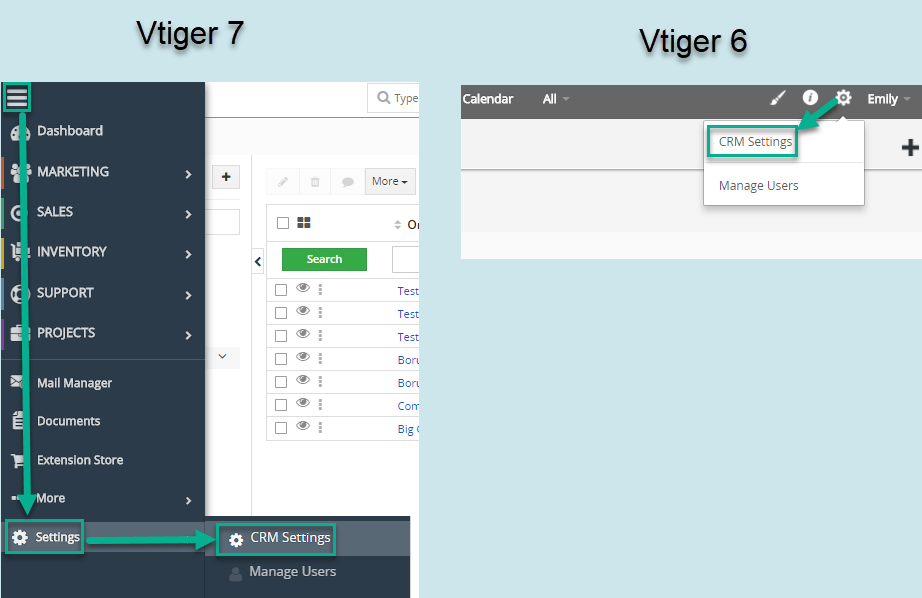
Step 2:
Vtiger 7: Go to Automation > Workflows, then Click “New Workflow” Button
Vtiger 6: Go to Other Settings > Workflows, the Click “New Workflow” Button
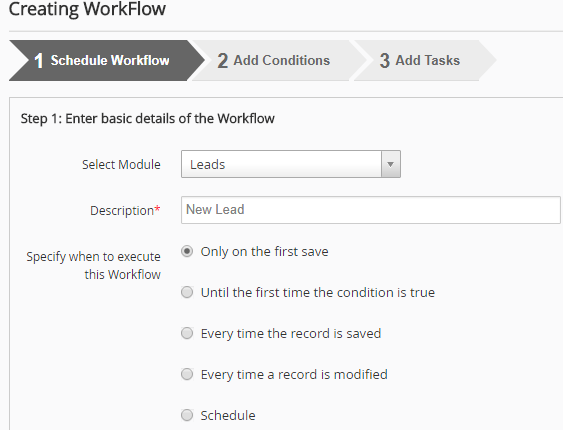
Step 3: Select the Module, Add the Description, and “Specify When to Execute this Workflow”
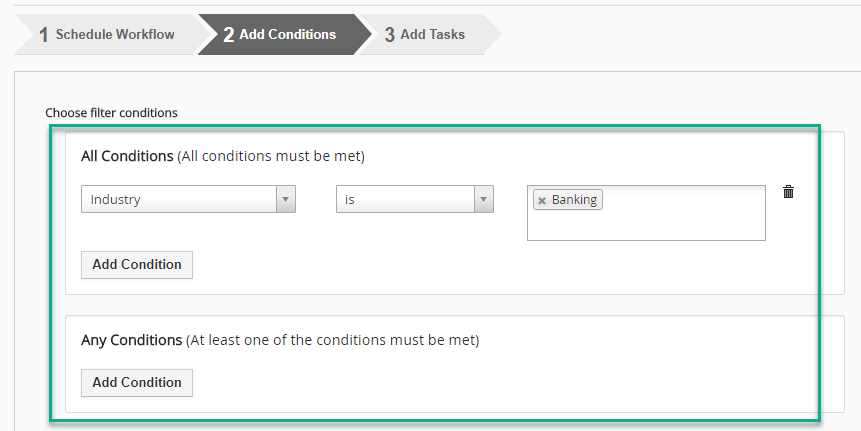
Step 4: Add Conditions
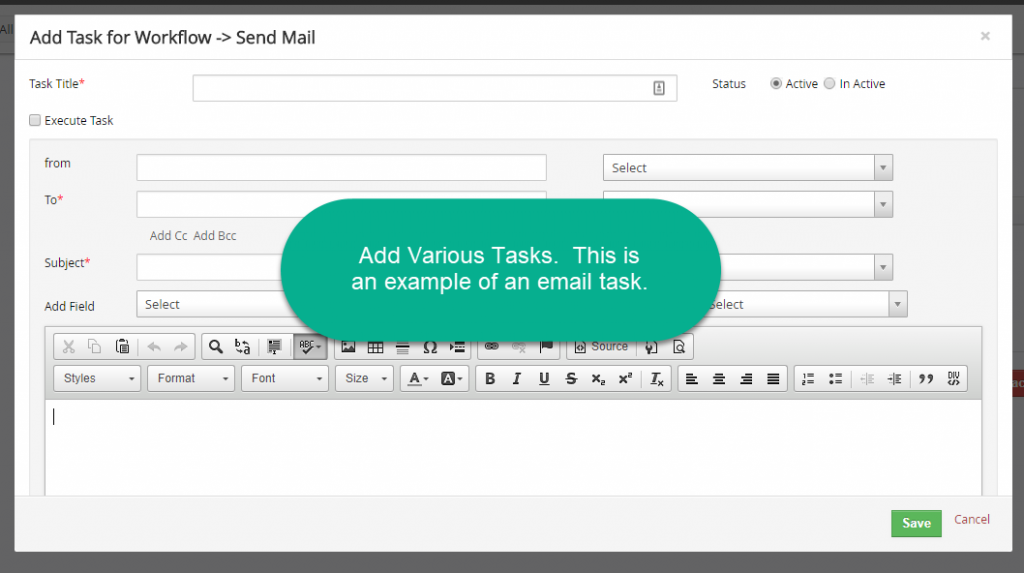
Step 5: Add Tasks that will be triggered based on the conditions and Save
Contact us to learn more or for help with your Vtiger CRM!
[button color=”custom” size=”default” light=”no” icon=”fa-comments” open_in_new_window=”yes” link=”https://www.boruapps.com/


